
So two weeks before Halloween, I was racking my brain, trying to think of something relatively fast and easy that I could use or make for a costume. We had no money for buying large amounts of fabric, so sewing a whole outfit was out of the question. I also had to find something that would work with my short hair, which I had recently dyed red. Suddenly I remembered: one of my Facebook friends had done the most adorable (and easy!) deer costume last year. The costume was mostly make-up based, and deer do have reddish hair, so, I thought, I should be able to make it work!
After looking on Pinterest, I discovered that the most popular version of a deer costume (and the one my FB friend did) involves an elastic headband, looping sections of hair through it to mimic deer ears, and inserting sticks for antlers. It’s very easy and very cute, but I have a pixie cut, so it wasn’t going to work for me. But then I thought, “How hard would it be to make little ears out of felt? And why not a cute tail while I’m at it?”
Unfortunately, I decided to go crazy-costume-perfectionist and also make real-looking antlers, but we’ll cover the easy part of this costume first! No need to save it for Halloween, either. Many children enjoy dressing up as animals on a regular basis, and the antler tutorial might be useful for those who enjoy Cosplay.
For this project, you will need:
• Deer Costume Pattern PDF
• Two 8 1/2 x 11″ sheets of Felt; one in a white or off-white colour, and one in a brownish/reddish colour. For the most realistic effect, the colours you choose should go well with your hair.
• A Sharpie
• Scissors
• Hot Glue Gun & Sticks
• A Sewing Machine and thread (optional, but will achieve the best results)

Step 1: Print off the pattern PDF onto a standard 8 1/2 x 11″ piece of paper, cut out the pattern pieces, and trace them onto your sheets of felt with the Sharpie. Notice how I put all of my pattern pieces on one side of my darker sheet of felt? That’s because I thought I might need a long strip or two of felt to use in making my own headband, or to cover a store-bought plastic hairband. Cut out felt pieces inside the lines you drew. Any Sharpie markings you leave on the felt will be visible on the finished ears.
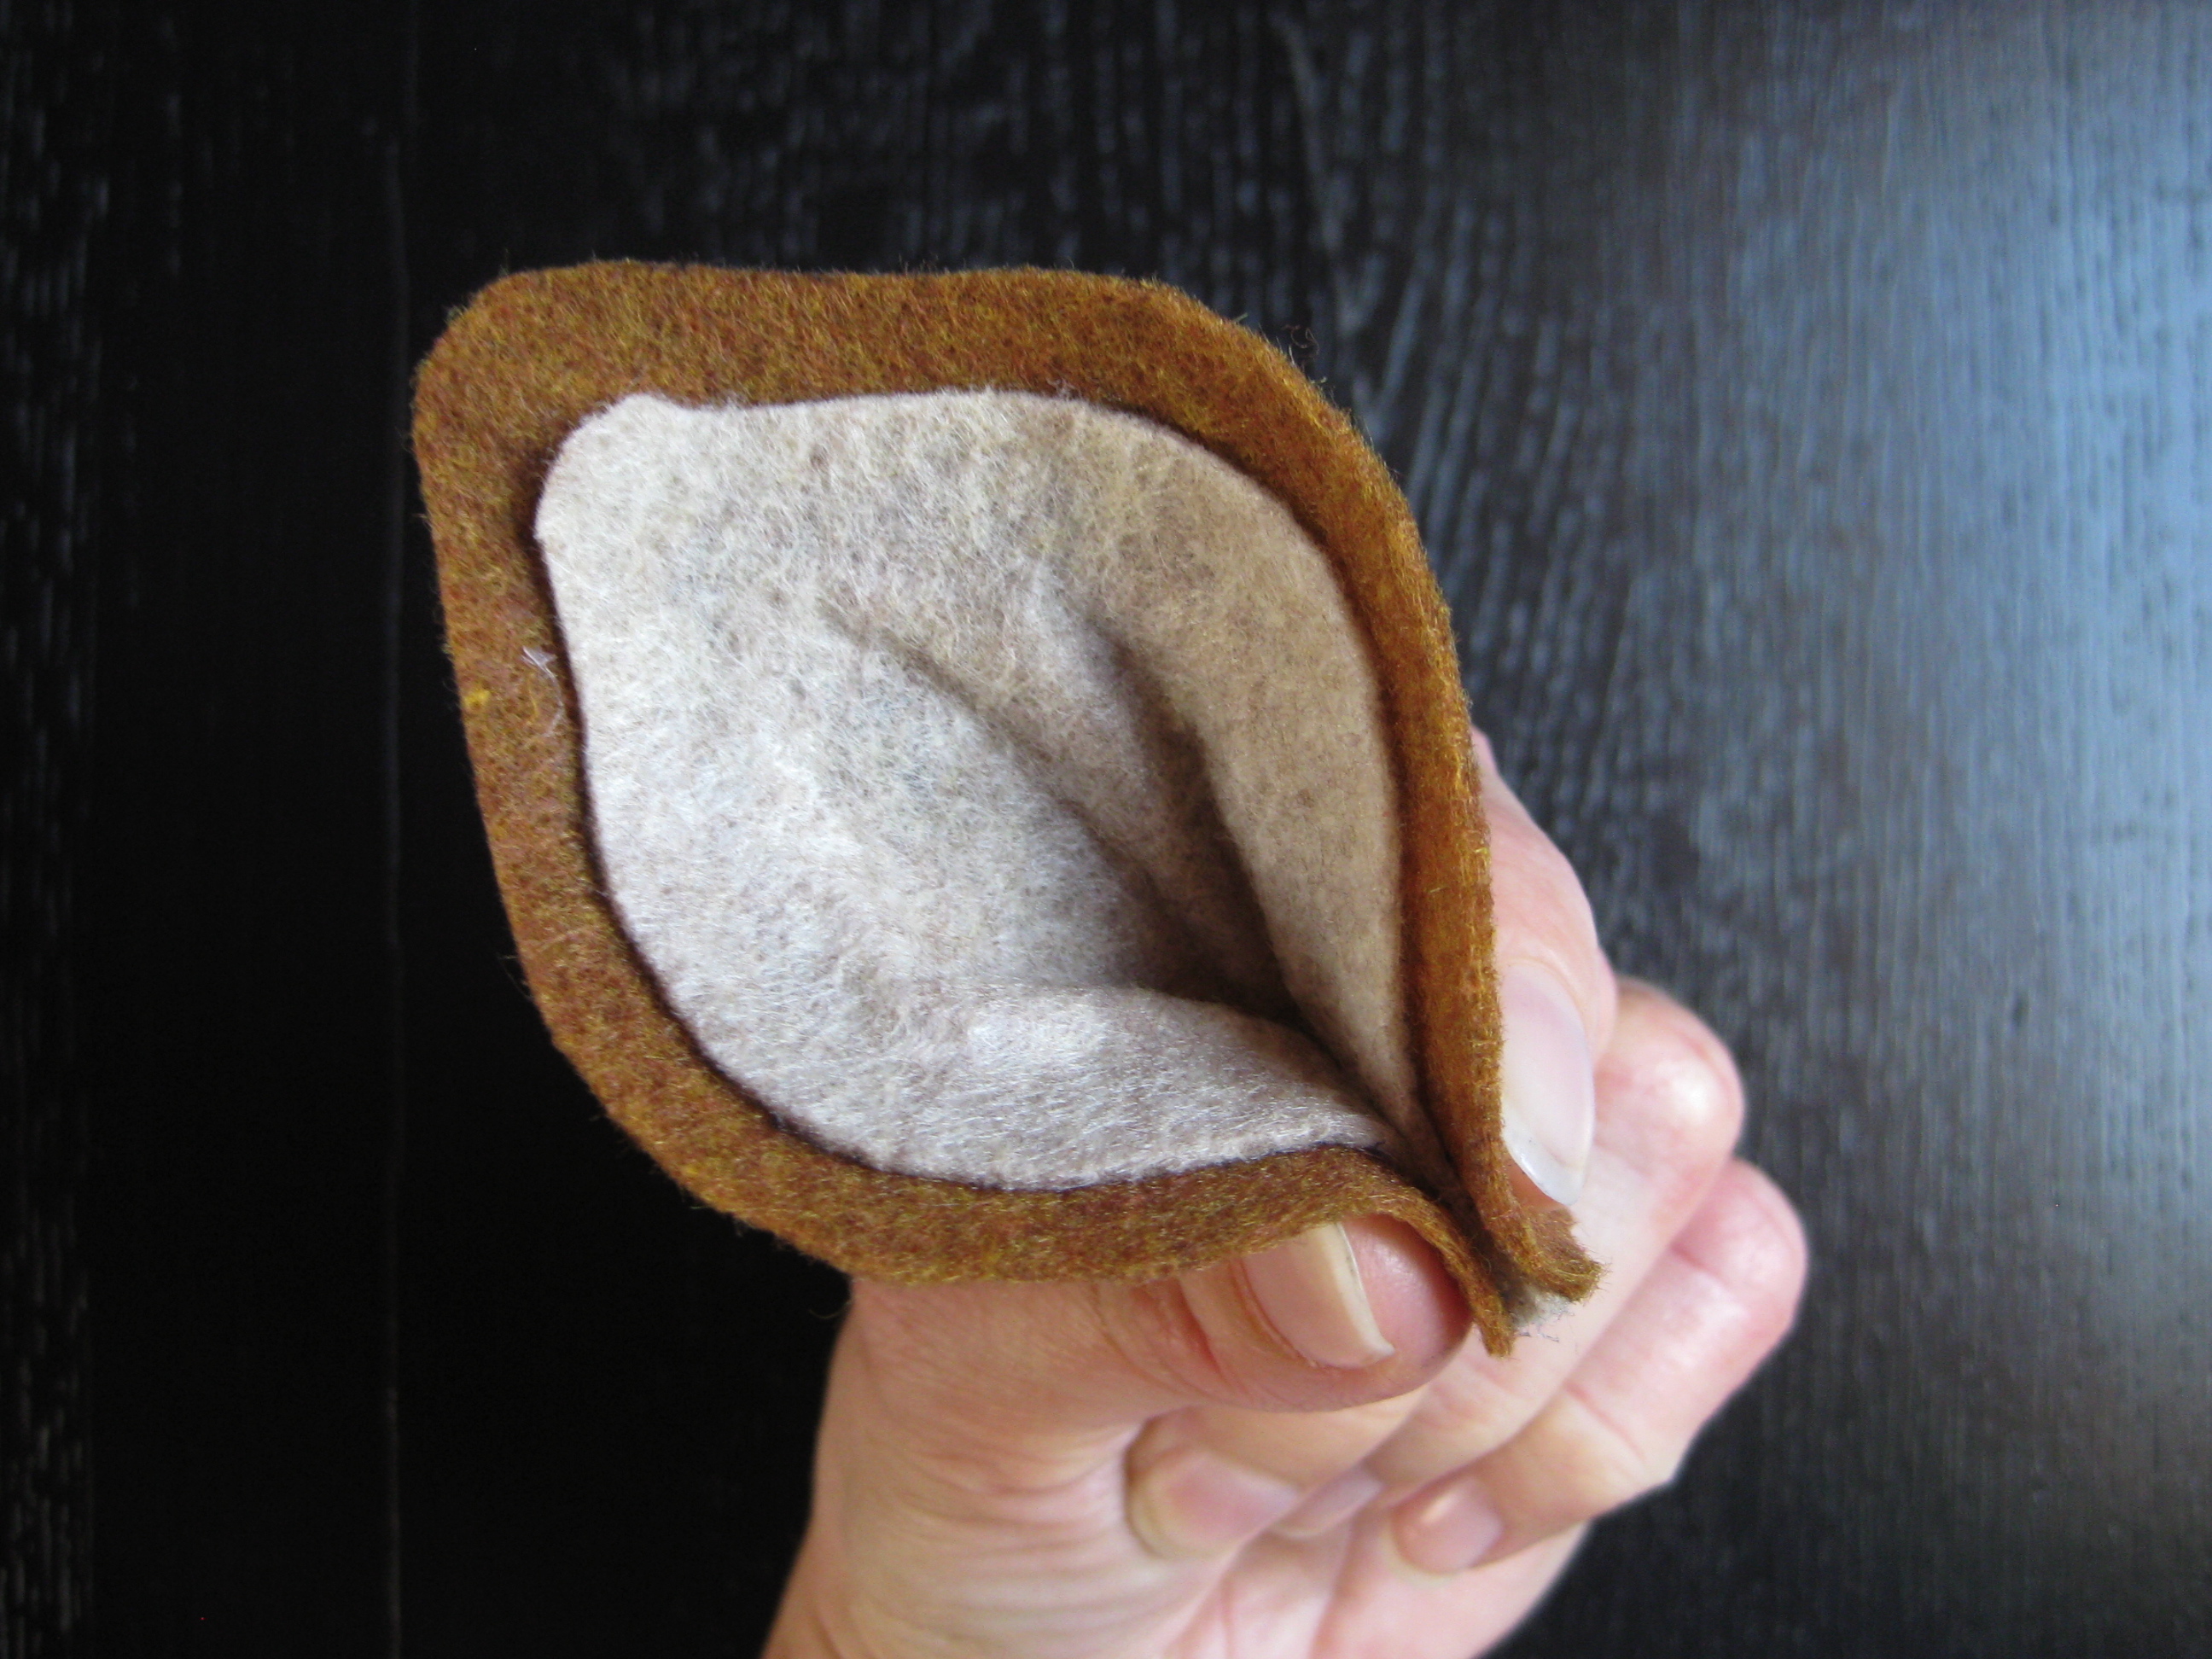
Step 2: Hot glue the lighter-coloured ear pieces onto the darker-coloured ear pieces, matching up the bottom edges. Put a dab of glue near one bottom corner and pinch the ear together as shown above. Hold until cool (clothes pins are useful for this). Repeat for the other ear.
I feel like I should mention here that these aren’t exactly accurate deer ears. Real deer ears are pretty much as big as their tails, but I wanted cute little ears, so that’s what I did!


(Sorry for the low picture quality. I did the tail at night. The night before Halloween, in fact!)
Step 3: Sew or hot glue the two darker-coloured tail pieces together as shown. Notice that you do NOT sew or glue right to the edges for these pieces. Leave 3/8″ open at each end of your stitching line.
Step 4: Sew or hot glue the two lighter-coloured tail pieces together on the curved edge, as shown. Open out, pressing if desired.
Step 5: Sew or hot glue top of tail to bottom. Make sure you’ve got the right sides together, and leave the bottom open. Snip the pointed tip about 1/8″ away from the stitching. If you don’t, your tail won’t look very good when it is turned, due to all of the extra fabric bunching at the top.
Step 6: Turn tail right-side-out and stuff with polyester wadding. If you don’t have any, cotton balls would work, too! Slip-stitch or glue the bottom closed.

Ta-da! The tail is finished. I sewed the one on the left, and I hot glued the one on the right. It’s pretty obvious which one looks better, but if you can’t sew, then just hot glue as neatly as you can. Though with such a small project, you could easily hand sew it!

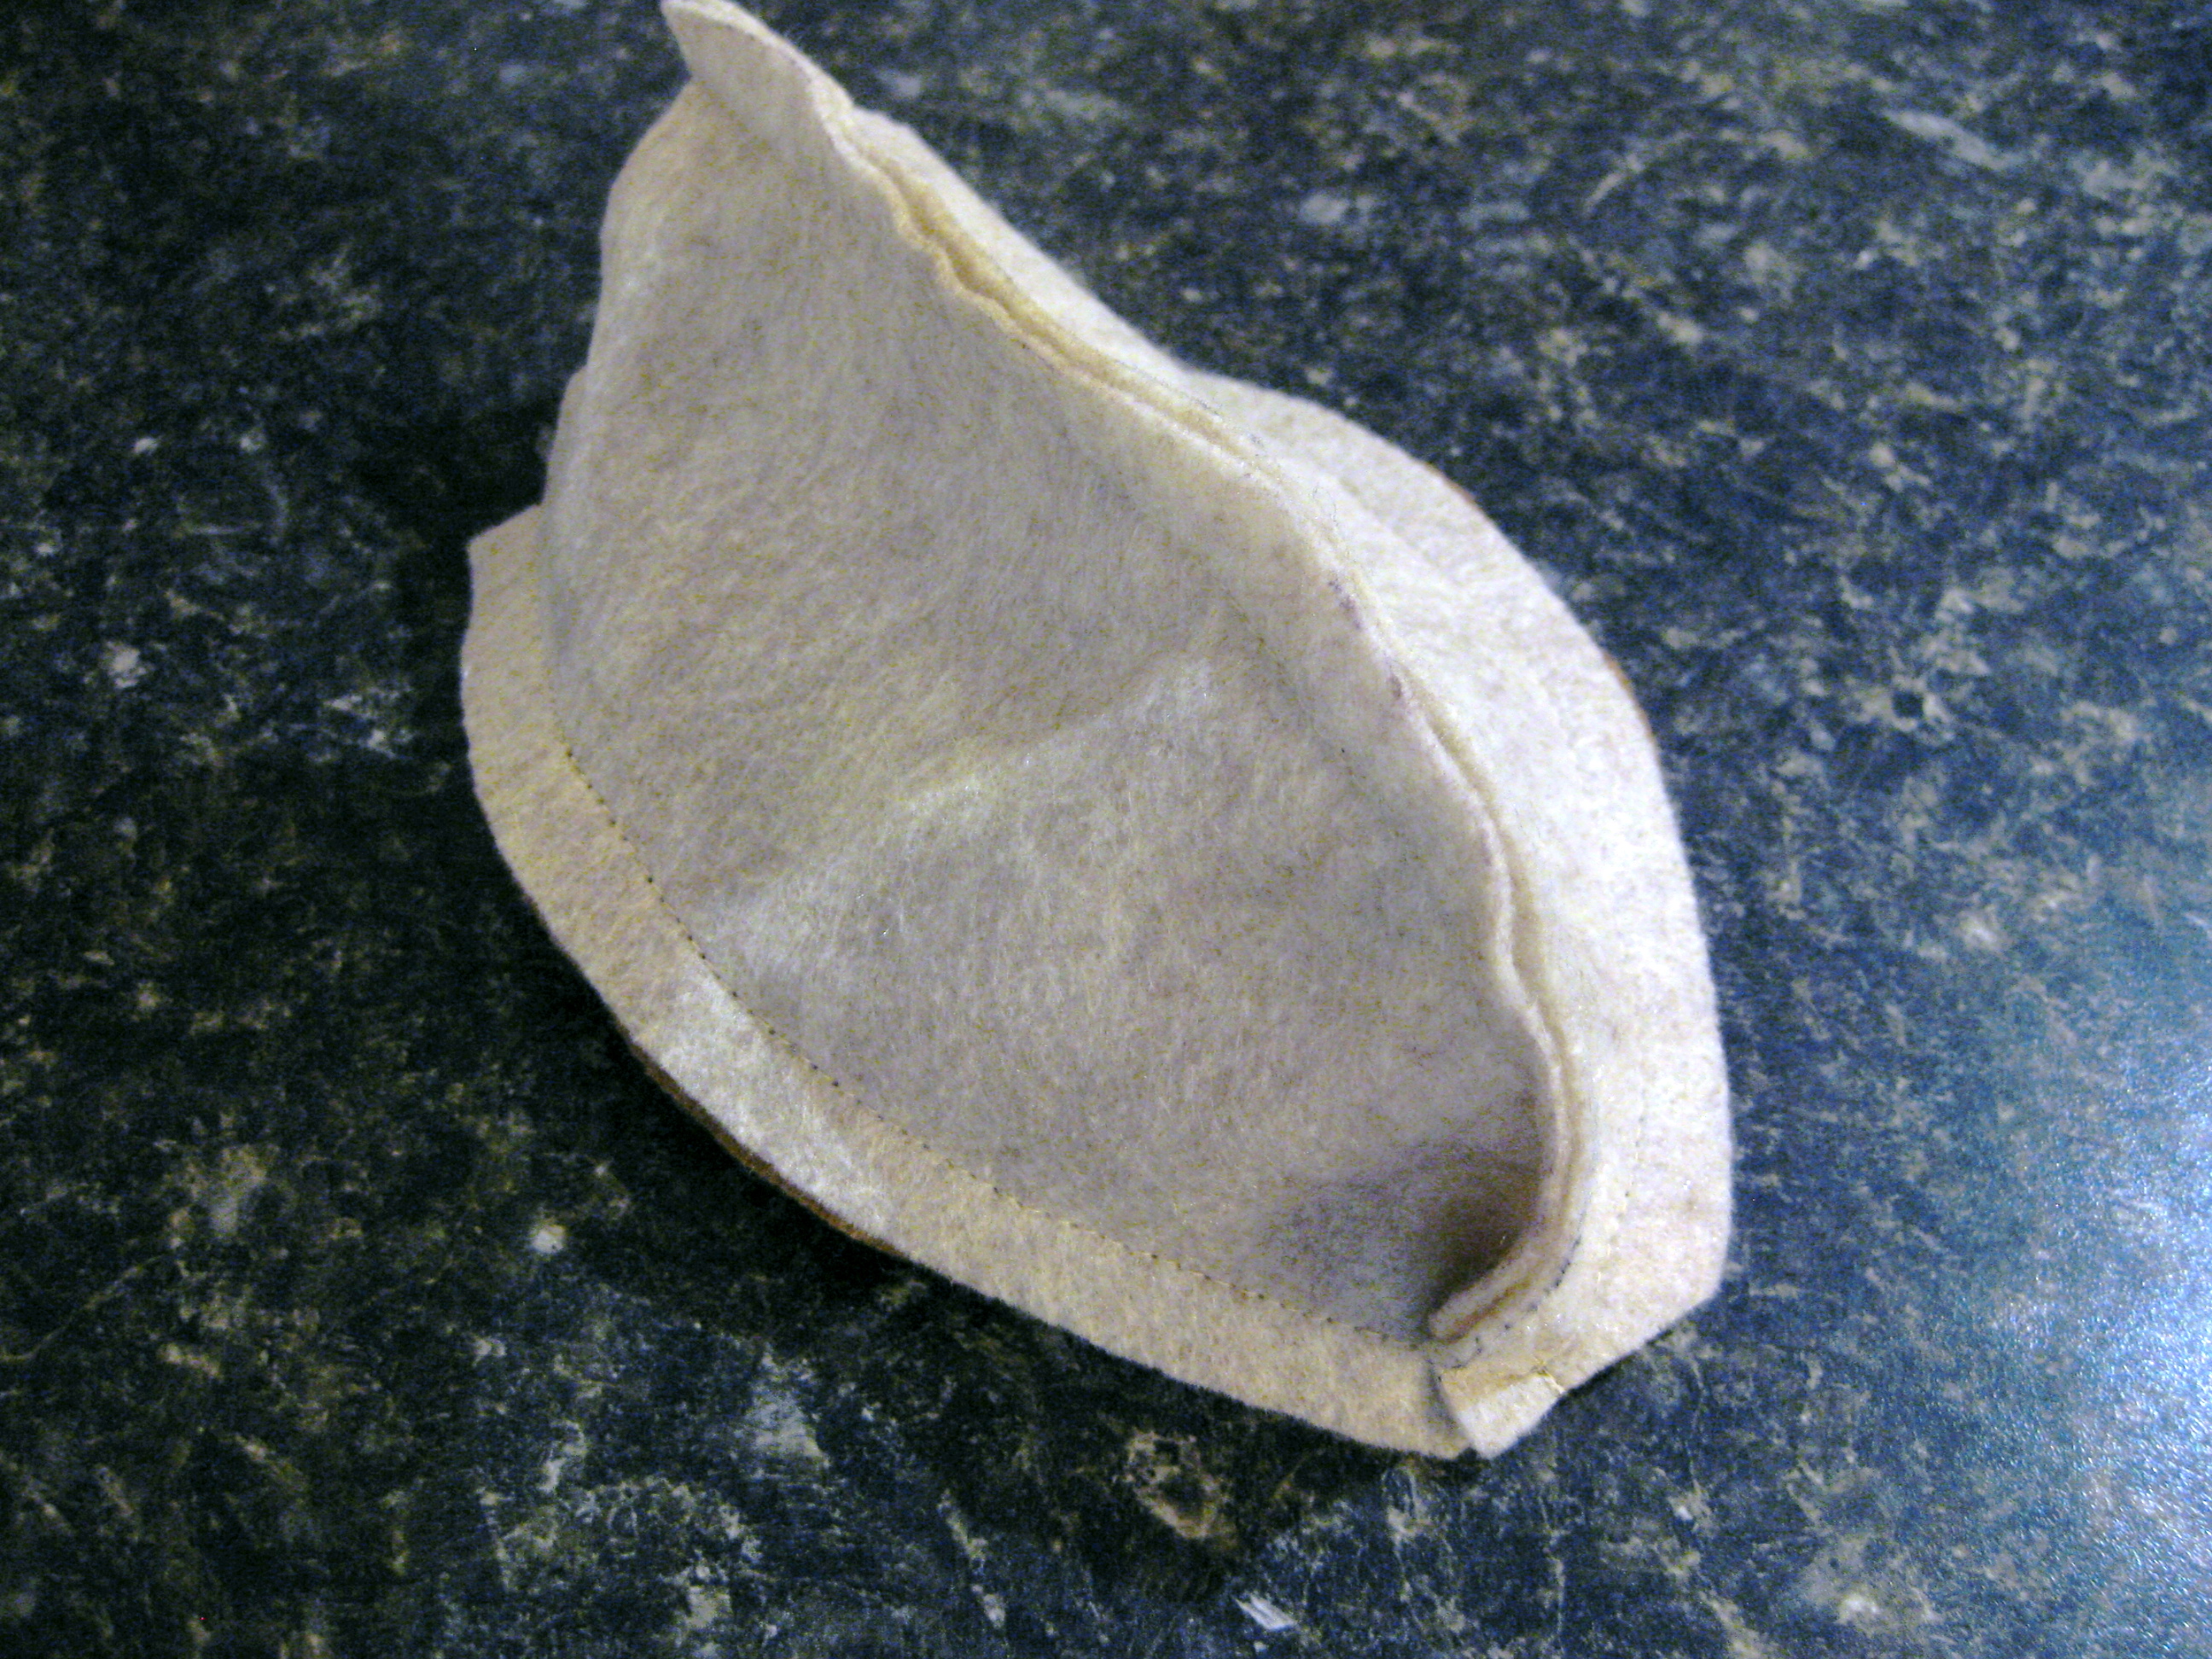
The finished tail and ears. That only took an hour, tops! You could just hot glue the ears to a cheap plastic hairband. . .

. . . like so; attach the tail to your pants, and be all set! (See? I did end up needing a strip of dark-coloured felt to cover my hairband!) Fawns and Does, after all, do not have antlers.
There are actually a few options for attaching the tail. I used safety pins, but you could also baste it on, or sew snaps onto the tail and your pants. Stick-on velcro would work as well. If you are making this costume as dress-up accessories for a child, it might be best to make some sort of belt to which you attach the tail. That way the kid can just fasten the belt around their hips and be all set! I had no problems at all with my safety pins though; and that’s really the fastest, easiest way.
I already had reddish-brown corduroy pants that were perfect for this costume, as well as a long-sleeved tee. To complete my deer look, I checked out several make-up tutorials on Pinterest, decided which ones I liked best, and told my kids that they had to leave me alone for an hour.

This is the final result! I used products that I already owned (my mineral make-up), so there’s no need to go out an buy an expensive face-paint kit with the full range of colours. Another bonus to using your own make-up: your face won’t break out in reaction to some strange new product being used on it!
After applying my basic primer and foundation powders, I used black eyeliner (powder) to do the nose. Next, I used a dark brown eyeshadow to do my eyebrows, extending the shadow down onto the top sides of my nose. I also shaded the bottom curve of my deer cheeks.
I applied a medium-dark coppery brown to the rest of my cheeks, my forehead, and the bottom curve of my chin.
An ivory eyeshadow was used around my eyes, and to highlight my nose and chin. I gave my eyes a thick outline of black eyeliner, and three coats of mascara. False eyelashes would have been lovely, and deer do have impressive eyelashes, but I have super-sensitive eyes and can’t wear them.
Lastly, I used my very lightest eyeshadow to do the spots. I also ended up deciding to extend the make-up to my collar bone area, since I was wearing a V-neck. I used the same dark brown, coppery brown, and lightest powder make-up as I had on my face. I’m really glad I did some make-up on my neck/décolletage, because it helped to tie the whole deer look together. Otherwise it would have looked like I only costumed my head (most people didn’t notice the tail until I was walking away).
If you use mineral make-up powders and you’re wondering how I managed to get such bold colours, the secret is in a moist application. Just wet your make-up brush, dab it gently on a tissue or bit of toilet paper to absorb the excess water, and then dip it into your desired eyeshadow powder and apply it to your face. Another option is to brush water onto your skin, and then apply dry powder. Both work equally well, though I find I get more control with a wet brush, since water on skin can drip and run where you don’t want it to. I used a moist application to get a good, dark black on my nose and eyes, and to do the light spots.
I want to emphasize that I am NOT a professional make-up artist! (Some of you are like, “Obviously!” LOL) All I did was closely study other people’s photographs and do my best to mimic them. I got several compliments on my make-up job though, so I bet you could, too!
Finally, I styled my hair so that it would cover up my real ears as much as possible, and cover the hairband.
Thus far, the deer costume would cost approximately $5; less if you already have a hairband you can use. Talk about cheap!
Dark brown coloured contacts would really have completed the look, but I had neither the money nor the time to order them. I’ve also never worn contacts in my life, so I probably wouldn’t have been able to put them in if I had gotten them!
Read on for the Faux Antler Tutorial. . .

When I decided that I wanted antlers for my costume, I looked up as many tutorials as I could. Cosplay sites (deviantART is amazing) have several different methods, but most of them involve multiple products, multiple steps, and lots of drying time in between. I had just over a week, so I knew I had to find something fast and easy.
After a bit of searching, I found this tutorial on Craftster. I really liked how realistic hers turned out, but I didn’t particularly want to use a wire framework, and I hate paper maché.
Then I discovered a wood and air-dry clay technique on one of my favourite blogs: Craftberry Bush. She was making hers for home decor accents, so they were a lot larger than I wanted mine to be, but the basic idea seemed perfect! I immediately went out into my forest to find suitable sticks. . .

It turns out that I only needed one long branch, which I cut into suitably-sized lengths with my awesome Felco pruners. I made the tips pointy by simply pruning them at a sharp angle. If you want to do this, I highly recommend using branches that were cut some time ago and have had a chance to dry out. Why? Because branches shrink as they dry. Not only do you not want your framework to shrink and pull away from your clay over time, but what if the clay seals the moisture into the branch, and it slowly rots on the inside? Neither scenario is particularly desirable. If you don’t have any branches that were previously cut and dried, try to find some old dead branches on a tree. Just make sure they aren’t so old that they’re falling apart! I also washed my branches off to remove any dirt and loose bark, and then dried them again near my wood stove before I cut them up.

Here are my stick antlers, hot glued together, with the joints wire-wrapped for stability. I probably should have just used masking tape like a normal person, but I had doubts about the clay being able to stick to the tape’s smooth surface. (I needn’t have worried, but you do need to use either tape or wire to reinforce your attachment points.) I made sure to glue the branch sections at angles to each other, so that my antlers would curve like natural antlers. Having real antlers to look at while you do this is very helpful, but if you don’t have any, just Google some pictures and you should get a good idea. I have also supplied a few pictures in this blog post, for your convenience.
Tip: keep your glue gun plugged in while you do the wire wrapping. You will probably need to re-glue some joints as you go, because the pulling of the wire will cause them to come un-stuck. If I had used masking tape, I probably would not have had this problem, because I wouldn’t have had to pull so hard.

To the left (above, if you’re viewing the mobile site) is a close-up of a wire-wrapped joint. I used 20 gauge medium temper brass wire. It wraps nicely and can bend and twist with normal hand strength. It’s also what I already had handy in my craft drawer! LOL It doesn’t matter what colour of wire you use, since you will be covering it up.

To the right, you can clearly see that I wired the antlers together (a decision I would later regret). What I did not regret was adding those loops of wire on each side. My thought at the time was that they would be good attachment points for when I was finished and trying to connect the antlers to a headband of some kind so that I could actually wear them. However, they ended up being most useful for hanging the antlers in their various drying stages! All I had to do was put a hook through one of the loops to hang the whole thing from my kitchen pot rack. No need to prop my antlers up with rocks or anything else that might dent them, stick to the clay, or ruin the paint job. It was great!
You do need to use pliers for very tight wire twists, like the ones I did when attaching one wire to another.
The next step is to cover your framework with air-dry clay. Also called paperclay, this amazing stuff doesn’t need to be baked in a kiln, or even in your own oven! I already had experience with one type: Martha Stewart Crafter’s Clay. It’s pretty expensive though, and I find that it’s difficult to join two pieces together smoothly, without obvious seams. I knew I wouldn’t be able cover an entire antler in one piece of clay! The Internet came to my rescue yet again, and I found this very helpful review of all sorts of air-dry clay brands. Here‘s another one.
I ended up choosing Creative Paperclay. Not only is it highly rated in both reviews, but it is made of mostly natural materials, non-toxic, and sticks to almost anything. Perhaps most importantly, it was actually available at my local Michaels craft store, and it was even a 50% off coupon week! Wohoo!
I really enjoyed working with the Creative Paperclay. True to it’s advertising claims, it had no odour, was easy to use, and stuck nicely! I found it very helpful to have a spray bottle of water nearby while I worked. I used it to keep lumps of clay that I wasn’t using from drying out, and when I wanted to re-shape an area or erase the seam between two bits of clay, I just sprayed it with water and then smoothed it with my fingers. You’re going to get rather dirty hands for this part, by the way. Just put on an apron to protect your clothes and accept the creative mess!
You only need to use a thin layer of clay, but I was still surprised at how much bigger my antlers got. This is actually good if you are making antlers for home decor (Go Big or Go Home! LOL), but I had wanted cute little antlers for my costume. I was actually pretty disappointed with how they looked at this point. . .

Here are both antlers, covered in clay, and dried. Drying time depends on how thick the layer of clay is, but I found 36 hours to be sufficient. One to three days is a good guideline.
The antler in front has been sanded (with 220 grit sandpaper). What a difference that makes, eh? I was so relieved! Instead of being lumpy and rough, sanding turns your creations into beautiful, smooth shapes that actually look like antlers. Yay! If you don’t have a pair of real antlers to look at, you should know that they are not perfectly round. Antlers are actually somewhat flattened, so be sure to sand your surfaces accordingly. Any given antler branch is wider/taller than it is thick.
It took me about an hour to sand both antlers. It’s a good time to put on gloves and clothes you don’t care about, and go for a walk outside while you work. I enjoyed the crisp fall air, and “clean-up” just meant putting my dusty clothes into the laundry hamper.
Perfection is not necessary, by the way. I’m sure you can see a few tiny cracks and recessed areas on the sanded antler in the photo above. Real antlers, just like anything grown in nature, have irregularities, so it’s just fine if yours do, too! If you have large pits or cracks, I would recommend filling them with more clay, allowing the clay to dry (24 hours), and sanding it again. Do try to sand the antler tips quite smooth, because real antlers are smoothest at the tips. They are also rounded, not super-pointy.

See how deer antlers have all of those ridges and bumps covering the bottom third or so? The Craftster tutorial has an excellent idea for mimicking those: hot glue!
My advice is to not try to add all of the texture you want at once. If you want a large ball of glue in one place (like around the very base of the antler), you need to build it up in layers. If you try to add a single large blob, the hot glue will just run and spread and drip, and you won’t get the bump you were going for. Do a few smaller bumps and lines, and when they have cooled, do another layer of glue on top. Also, I found it helpful to start at the back of the antler, near the bottom. It takes a little while to get the hang of squeezing the glue gun trigger just enough, so if you make any mistakes at first, they will be in a much less obvious place.
When you have applied all of the texture you want, let the antlers cool fully before priming them. I waited ten minutes.

Here are both of my antlers after hot-gluing. The one on the left has been primed. I used artist’s Gesso because that’s what I had handy, but you could use pretty much any water-based primer. I wasn’t quite happy with the level of coverage on the hot glue textured parts, so I did two coats of Gesso on those, and hung them to dry.

See how real antlers are quite dark at the base, but the ridges and bumps are light? Notice also how the rest of the antler still has some dark streaking? That’s what I wanted to mimic, to make my antlers look as real as possible.
I got out my artist’s acrylic paints in Titanium White, Raw Umber, and Yellow Ochre. (In hindsight, I should probably have used Burnt Umber instead of Raw Umber.) Using a palette knife, I mixed a bone colour with mostly white and just a bit of the other two. Never use a brush for mixing! Keep in mind that the paint will dry slightly darker than it looks when wet. Also, make SURE you mix enough of the bone colour to last through the entire project! I made a 1 1/2 – 2″ blob of paint on my palette, and I had a bit left over. Far better to have left-overs than not enough, because if you end up needing more of a particular shade, rest assured that you will never duplicate it again. No matter how hard you try.
To keep mixed paint on your palette moist between uses, spray it with water and cover it with a small bowl or container. It should keep for a whole day like that.
Both antlers received one coat of the bone colour, and were hung to dry. Acrylic dries really nice and fast; particularly artist’s acrylics. Those cheap craft acrylics contain more water, so they are a bit better for blending (slower dry time), but that higher water content also means a lower pigment content, so you have to do multiple coats to achieve the same coverage that you can get with a single coat of artist’s acrylics. Trust me: the lower price tag isn’t worth it!
I did not, by the way, paint the very bottoms of the antlers. Acrylics create a non-breathable layer of plastic over whatever you put them on, and I wanted to keep the porous quality of the clay intact for maximum glue adhesion. But if you are using your faux antlers for decorations, you should definitely prime and paint every square inch.

My painted antlers! After that initial coat of bone colour was dry, I used a small round brush to apply streaks of raw umber, and then, using a clean brush, blended it in with more bone paint. I only worked on one antler tip at a time, because acrylics dry quickly. If you find that you aren’t able to blend as much as you like before the paint dries, simply dip your brush in water to moisten it a bit more. Keep in mind that you do want a streaky finish, so you don’t want to blend too much.
The very tips of antlers are the lightest in colour, so I put no dark streaks there.
For the bumpy base sections, I first painted the entire area in raw umber. Then, while the paint was still wet, I began to apply the bone-white to the ridges and bumps. It mixed with the darker colour to create a mid-tone, which dried just enough as I worked my way around the antler, so that I could add more bone colour when I came to those areas again. In this way, the two colours made three, giving me more depth and realism.
When the paint had all dried, I saw that the overall tone was somewhat cooler than real antlers, which is what makes me wish I had used burnt umber instead of raw. A warmer shade would also have co-ordinated better with my deer ear colours. However, I was literally finishing these on the afternoon of Halloween, so I had no time to repaint!
I hung them to dry fully while I did my make-up, and then assembled the antler headband. . .

I cut out two pieces of felt, each with a round end for gluing the antlers to; and a smaller, squarish end for gluing the ears to. I stuck everything together using hot glue.

I had bought a hairband that felt comfortable to wear and seemed like it would stay securely in my hair (Goody brand, if you’re interested). I used my last bit of brass wire to attach the antler assembly to the hairband, wrapping it tightly, and making sure that no pointy bits ended up facing down to stab me in the head.

It worked! All of the pieces stayed firmly attached, and I managed to finish it before we left to go trick-or-treating. Yay!

While I was quite pleased with how my costume looked, I ran into several problems. . .
For starters, my hairband wasn’t as secure as I thought it would be. Once I added the weight of the antlers (as light as they are), I discovered that I had to keep my head quite straight and rigid, or the headband would fall off. I had to hold onto one of the antlers while I walked, and I ended up with a very painful, tight, sore neck the next day. I guess that’s why the ones for sale on Etsy are full wrap-around styles with ties!
Secondly, I really didn’t give myself enough time to finish the antlers properly. I should have sealed them with two coats of varnish and let them cure completely before wearing them. I thought it would be okay, since acrylic paint is waterproof when it’s dry, but guess what? This is Alberta, and we often have crappy weather for Halloween. As it turned out, it rained on and off while we were out trick-or-treating, and one of my antler tips softened up and got damaged. It’s not too bad, but it wouldn’t have happened at all if I’d done things properly.
Another regret, that I mentioned earlier: wiring the two antlers together. When I did it, I thought it would be a great way to keep the two antlers in the position that I wanted them to be, with the right distance between them. However, since the clay and glue texture added so much thickness to the antlers, they ended up really too close together. Also, they were both at odd angles, pointing sideways and back, whereas real antlers curve forward. Furthermore, having them wired together meant that I could only work on one antler at a time. I had to cover one branch in clay, wait for it to dry (24 hours), and then do the other side. Same for painting. This wouldn’t have been such a big deal if I’d been doing this project a month ahead of time, but I was under time constraints! I really highly recommend making each antler with its own separate wire loops.
I blame my fourth complaint on my inexperience: I don’t like how big the antlers ended up. Even though they are each only 7″ tall and 6″ wide, half the size of real antlers, I was really going for smaller and cuter. The problem was that I made my stick framework the exact size that I wanted my finished antlers to be. So if you are making costume antlers, make the skeleton smaller.
Finally, I’m just not happy with the overall shape of my antlers. Even though I tried to cut the sticks at angles to mimic the curves of natural antlers, they still look stiff and wooden (surprise, surprise!). If I ever make antlers again, I will use a wire or aluminum foil framework that I can bend and shape to my satisfaction.
Having said all of that. . . I had a lot of fun taking my kids trick-or-treating, and I got a lot of compliments on my costume! A couple of people also joked that the hunting season was starting the next day, which brings up an important point: don’t go out into a rural area, dressed like a deer, any time after November 1st! I’m glad I did my little photo-shoot in my own yard, or I may have been risking my life. Too many hunters just see antlers and shoot.

For now, my deer headband has been disassembled, and my faux antlers are being used as home decor accents. I guess I’ll have to paint the bottoms after all! LOL
Happy Hunt- er, Halloween! 😉

Reblogged this on rockymtnkitten.
LikeLiked by 1 person
Thank you for reblogging! =)
LikeLike
can you explain more on how you sew the tail? im stuck on making the tail. is there a video somewhere i can watch to get more of an idea on how to do it? thank you!
LikeLike
Hi Tini! I don’t/can’t do videos, and I’m afraid I don’t know how to explain it better than I did in the tutorial. Can you post photos of your tail? That might help me to trouble-shoot.
LikeLike
im stuck on how to get the darker color onto the lighter color. i sewed the lighter color along the curve and i sewed the two darker colors together. where do i sew the darker color onto the lighter color?
LikeLike
i dont know how to post pictures of this. im not a sewer this is my first real time. 😊 can you post more pictures please of the tail.
LikeLike
I’m so sorry Tini, the email notification of your comment went to the wrong folder, and I didn’t see it on time! Did you figure it out in the end?
LikeLike
We bought two goat skeletons, made out of plastic of course! We want to turn them into reindeer skeletons because we’re doing a “Nightmare Before Christmas ” theme in our yard this year. Your tutorial is one of the best.
We intend to cut off the plastic horns on coaxed skeletons, use Bondo to cover the holes and paint the bondo to match the coloration of the skull.
Will post a picture when we’re done. Remaking the sleigh out of quarter inch plywood and putting a jack Skellington in it. Of course I’m dressing like Oogity Boogity from the movie, to hand out candy.
We have Pumpkin patterns for Jack Skellington and Oogitty. We are making a Sally out of cloth and it will look incredible. I can’t wait. Oh and we’re going to spray paint a small Christmas tree black and put presents with snakes and mice underneath . And we have a zero we made to fly from the tree. Just have to light up his nose is all.
Going to make constructible /Pinterest article out of this and I will give you credit if we use your method. Thank you.
LikeLike
I almost forgot. We have the soundtrack from the movie we’re going to play outside.
LikeLike
I am probably one of the few people on the planet who has not seen that movie, but your project sounds awesome!
LikeLike
In my experience, hunters are very careful about identifying the animal they’re hunting clearly, and making sure they can see beyond the animal to avoid any unintentional shooting accidents. Teach it in the hunting safety course. Now I wouldn’t run around the woods wearing antlers but, most hunters are safe. And most would not shoot at a pair of antlers without identifying the creature and what’s beyond it. Have a good night
LikeLike
That is my experience as well. My husband hunts, and he is very careful to follow all of the legal and moral aspects of hunting. Nevertheless, there are unethical hunters out there, and it would be a tragic waste of life to be shot just because you were dressed up as a deer! Better safe than sorry.
LikeLike
Omg you did such a good job!! Love this.
LikeLike
Thank you, Erica!
LikeLike